Raspberry Pi Secure Tunnel: Keeping Your Digital Life Safe And Sound
Protecting your online world, especially at home, feels pretty important these days, doesn't it? You know, with so much of our lives happening on the internet, keeping our personal information and home networks safe is a big concern for many people. This is where a Raspberry Pi secure tunnel can come into play, offering a rather clever way to add an extra layer of protection to your digital comings and goings. It’s a simple little computer, really, but it can do some quite powerful things for your peace of mind.
A Raspberry Pi, that tiny and affordable computer, has become a favorite for all sorts of projects, from the kitchen table tinkerer to the classroom coder, as Raspberry Pi Holdings PLC makes computing accessible and affordable for everybody. It’s not just for learning programming through fun, practical projects, though that’s a huge part of its charm. You can also use it to build something truly useful for your home, like a secure connection that keeps your data private, which is pretty neat.
For anyone who cares about their online privacy, or who needs to get to their home network from somewhere else without worry, setting up a secure tunnel on a Raspberry Pi is a smart move. It’s a way to make sure your internet traffic stays hidden from prying eyes, giving you a sense of calm about your digital footprint. This guide will walk you through what a secure tunnel is, why you might want one, and how your Raspberry Pi can help you achieve that safety, you know, for your own stuff.
Table of Contents
- What's a Raspberry Pi Secure Tunnel Anyway?
- Why You Might Really Want One for Your Raspberry Pi
- Picking the Right Tool for Your Raspberry Pi Secure Tunnel
- Getting Your Raspberry Pi Secure Tunnel Set Up
- Real-World Uses for Your Raspberry Pi Secure Tunnel
- Keeping Your Raspberry Pi Secure Tunnel Running Well
- FAQs About Raspberry Pi Secure Tunnels
What's a Raspberry Pi Secure Tunnel Anyway?
Think of a secure tunnel as a private, protected pathway across the public internet. When you connect to the internet, your data usually travels out in the open, so to speak. A secure tunnel wraps your data in a kind of digital shield, making it unreadable to anyone who might try to peek at it. This pathway connects your device, like a laptop or phone, directly to your Raspberry Pi at home, no matter where you are in the world, which is pretty clever.
Why Bother With One?
Well, you might wonder why you'd want to go through the trouble, right? The main reason is safety. When you're using public Wi-Fi at a coffee shop or airport, your information could be at risk. A secure tunnel makes that public connection act as if you're still sitting at home, connected to your own private network. It means your online activities, like checking bank accounts or sending emails, stay just between you and the websites you visit, which is a good feeling.
Another big reason is getting to your home stuff when you're not there. Maybe you have files on a home server, or you want to check on your smart cameras. A secure tunnel lets you do that safely, as if you were right there in your living room. It's a bit like having a secret key that only works for your own front door, even when you're miles away, so, it's quite handy.
- Mark Singer Gorilla Glue Passed Away
- Sydney Sweeney Naked
- Spider Man Video Sophie
- Xxx Is Equal To 2024 Movie
- V3 Vegamovies.bitbucket.io
How It Works, Simply Put
At its core, a secure tunnel creates an encrypted link between two points. One end is your device, and the other end is your Raspberry Pi. All the information that goes between them gets scrambled up, or encrypted, before it leaves your device. Then, when it reaches your Raspberry Pi, it gets unscrambled. This way, if anyone tries to intercept your data along the way, all they see is a jumble of meaningless characters, apparently.
The Raspberry Pi acts as the "server" for this tunnel. It's always ready at home, waiting for your device to connect. Once you connect, all your internet traffic goes through that secure pathway to your Pi, and then out to the internet from your home network. This means your online presence appears to be coming from your home, giving you a good deal of privacy and access, you know.
Why You Might Really Want One for Your Raspberry Pi
The Raspberry Pi, a tiny and affordable computer, is a fantastic tool for this kind of project. It's small, uses very little electricity, and can run all day, every day, without much fuss. This makes it a really good choice for something like a secure tunnel server that you want to keep on all the time. It's pretty much always ready to serve, so.
Protecting Your Privacy, You Know
In a world where online privacy feels more important than ever, a secure tunnel gives you a lot of control. When you use public Wi-Fi, other people on the same network might be able to see what you're doing. With a secure tunnel, all your data is hidden. It’s like having a private conversation in a crowded room – nobody else can hear what you're saying. This is especially useful for things like online banking or sensitive work tasks, which is just a little bit reassuring.
Also, your internet service provider (ISP) can usually see what websites you visit. While they might not look at the content, they do see the addresses. A secure tunnel can help hide these browsing habits from your ISP, making your internet use a bit more private. It’s a way to keep your online life more to yourself, which many people find appealing, you know.
Accessing Your Home Network from Anywhere
Imagine you're away from home and suddenly remember you need a file from your home computer, or you want to check your security cameras. Without a secure tunnel, doing this safely can be tricky. With your Raspberry Pi acting as a secure gateway, you can connect back to your home network from anywhere in the world, securely. It's like having a remote control for your home network, which is very convenient.
This means you can access your personal cloud storage, stream media from your home server, or even control smart home devices as if you were physically there. For people who travel often or work remotely, this kind of access is incredibly helpful. It just makes things easier, doesn't it?
Keeping Your Smart Devices Safe
Many smart home devices, like cameras or doorbells, connect directly to the internet. Sometimes, these devices aren't as secure as they could be. By routing their traffic through your Raspberry Pi secure tunnel, you can add an extra layer of protection. This can help prevent unwanted access to your devices and keep your home network more secure overall. It's a bit like putting a digital fence around your smart gadgets, you know, for better safety.
This is especially good for those who are building exciting physical computing projects with their Raspberry Pi, perhaps involving smart sensors or automated systems. Making sure these projects are secure from the outside world is a very smart move, and a tunnel helps a lot with that, apparently.
Picking the Right Tool for Your Raspberry Pi Secure Tunnel
When you decide to set up a secure tunnel on your Raspberry Pi, you'll find a few different software options available. Each has its own strengths, so choosing the right one depends on what you need and how comfortable you are with setting things up. The Raspberry Pi Foundation provides access to online coding resources and challenges that are free for everyone anywhere, which can help if you're looking to learn more about these tools.
WireGuard: Quick and Clean
WireGuard is a newer option for creating secure tunnels, and it's become quite popular because it's very fast and simple. It uses modern encryption methods and has a smaller amount of code compared to some older options, which means it can be quicker to set up and often runs more smoothly on devices like the Raspberry Pi. If you're looking for something efficient and straightforward, WireGuard is a really good choice, more or less.
People often say it's easy to get going, even if you're not a seasoned computer expert. Its performance is also a big plus, meaning your internet speed won't slow down too much when you're connected through the tunnel. It's a pretty good balance of speed and security, you know.
OpenVPN: Tried and True
OpenVPN has been around for a while, and it's a very well-known and trusted option for secure tunnels. It's incredibly flexible and offers a lot of ways to customize your setup, which can be great if you have specific needs. Because it's been used for so long, there's a huge amount of information and community support available online, so if you run into a problem, chances are someone else has already found a solution, which is very helpful.
While it might be a bit more involved to set up than WireGuard, its proven track record and wide range of features make it a solid choice for many. It's a bit like a sturdy, reliable old car – it gets the job done well, even if it takes a little more effort to get started, basically.
Other Options to Consider, Perhaps
While WireGuard and OpenVPN are the most common, there are other ways to create secure connections. Sometimes people use SSH tunnels for simpler, temporary connections, or even look into more specialized tools depending on their exact needs. However, for a general-purpose secure tunnel that's always on, the two main options usually cover most situations. It's good to know there are other ways, but these two are typically the go-to choices, you know.
Getting Your Raspberry Pi Secure Tunnel Set Up
Setting up your Raspberry Pi secure tunnel might seem a bit technical at first, but it's totally doable, even for those who are just getting started with these tiny computers. The global Raspberry Pi community is a great place to find help, and there are many guides out there. Remember, the Raspberry Pi is designed to help people learn programming through fun, practical projects, so this is just another one of those exciting things you can do with it.
What You'll Need, Basically
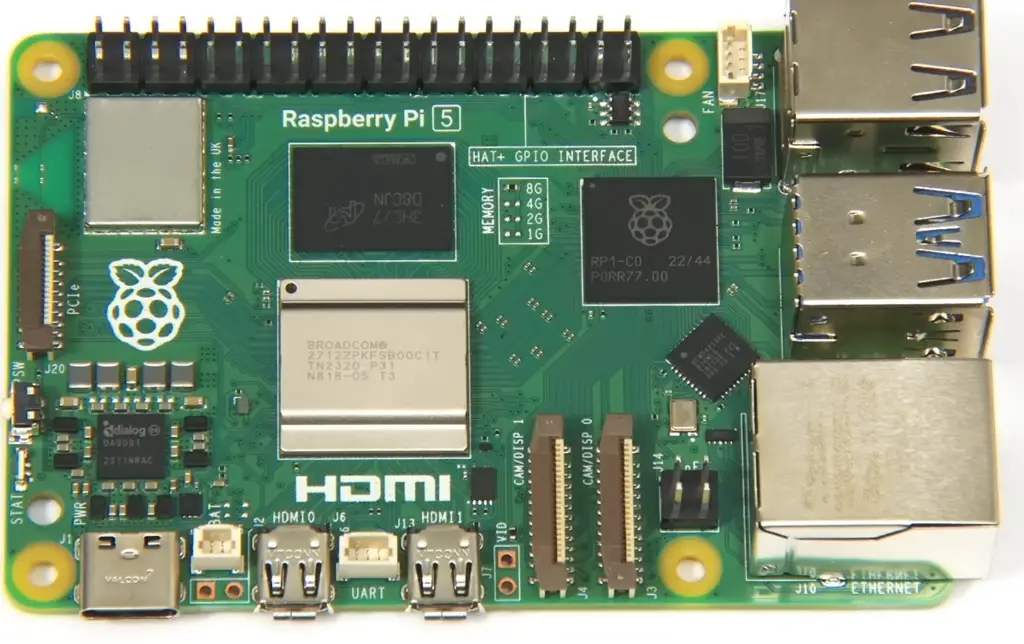
First off, you'll need a Raspberry Pi computer, of course. Any recent model will work well, like a Raspberry Pi 3B+, 4, or even a Zero 2 W if you're looking for something super small. You'll also need a good quality SD card, a power supply for your Pi, and an internet connection at home. A bit of comfort with using the command line on your computer will also come in handy, but you don't need to be an expert, just a little bit familiar.
You'll also want to make sure your home internet router can be set up to allow incoming connections to your Raspberry Pi. This often means something called "port forwarding," which just tells your router to send certain internet traffic to your Pi. It's usually a setting you can find in your router's control panel, you know.
A Simple Overview of the Steps
The general process involves a few steps. First, you'll get your Raspberry Pi ready with its operating system, usually Raspberry Pi OS. Then, you'll install the secure tunnel software, like WireGuard or OpenVPN, on your Pi. After that, you'll set up the configuration files, which are like instructions for the software, telling it how to create the secure connection. This involves creating digital keys, which are like secret passwords for your tunnel, more or less.
Finally, you'll configure your router for port forwarding, and then set up the client software on the devices you want to connect, such as your laptop or phone. Each step has its own details, but there are plenty of online resources, including the official documentation for Raspberry Pi computers and microcontrollers, that can guide you through it. It's a bit like following a recipe, really.
Tips for a Smooth Setup, Just a Little
To make things easier, it’s a good idea to follow a step-by-step guide very carefully. Double-check every command you type, as a small typo can cause issues. Also, make sure your Raspberry Pi has a fixed IP address on your home network. This means its address won't change, which is important for your router to always know where to send the tunnel traffic. A bit of patience goes a long way here, you know.
If you get stuck, don't be afraid to search online forums or the Raspberry Pi community. Chances are someone has faced the same issue and found a solution. The community is very supportive, and people are often happy to help out. It's a shared learning experience, you see, which is quite nice.
Real-World Uses for Your Raspberry Pi Secure Tunnel
Once your Raspberry Pi secure tunnel is up and running, you'll find it opens up a lot of possibilities for how you use the internet, especially when you're away from home. From industries large and small, to the kitchen table tinkerer, Raspberry Pi computers make computing accessible and affordable for everyone, and this secure tunnel project is a prime example of that practical usefulness.
Working from Home, More or Less
For many people, working from home or from different locations has become common. A secure tunnel lets you connect to your home network as if you were physically there, which is very helpful for accessing work files or internal systems that might be restricted to your home network. It adds a layer of security that public Wi-Fi simply doesn't offer, making your remote work setup much safer. It's a bit like having your office network follow you, which is very convenient, apparently.
Securely Sharing Files with Family
Do you have a lot of family photos, videos, or documents you want to share securely? Instead of relying on third-party cloud services, you can set up a file server on your Raspberry Pi at home. Then, using your secure tunnel, family members can connect to it safely from their own locations. This keeps your personal files truly private, just among your family, without them being stored on someone else's servers. It's a good way to keep things personal, you know.
Protecting Your Kids' Online Activities
The Raspberry Pi Foundation, a UK registered charity 1129409, helps young people realize their full potential through the power of computing and digital technologies, including learning coding for kids, teenagers, and young adults. When kids are learning coding for kids, teenagers, and young adults, creating games, animations, and more with code, they are online. A secure tunnel can help by routing their devices' traffic through your home network, allowing you to apply your home network's content filters or security measures even when they are out and about. This gives parents a bit more control and peace of mind over what their children are accessing online, which is pretty important.
You could even set up a specific profile for their devices that always connects through the tunnel, making sure their online experiences are safer, no matter where they are. It’s a bit like having a digital guardian angel for their online adventures, you see.
Keeping Your Raspberry Pi Secure Tunnel Running Well
Once your Raspberry Pi secure tunnel is set up, it's not quite a "set it and forget it" kind of thing, though it's pretty close. A little bit of regular care will help make sure it keeps running smoothly and securely. Just like any computer, your Raspberry Pi and the software on it benefit from some attention now and then. This ensures it stays a reliable part of your home network, you know.
Regular Updates, Obviously
Software gets updated all the time, often to fix security issues or add new features. It's really important to keep your Raspberry Pi's operating system and the secure tunnel software up to date. This means running updates regularly, perhaps once a month or whenever you hear about a new version. The Raspberry Pi team works hard on these updates; for example, they recently put a lot of work into updating packages and testing to get their public Trixie repo ready, so updating a Bookworm image to Trixie is now possible. These updates help keep your tunnel safe from new threats and make sure it performs its best. It's a pretty simple step that makes a big difference.
Checking Connections, Sometimes
Every now and then, it's a good idea to test your secure tunnel connection. Try connecting from a public Wi-Fi spot or a friend's house to make sure everything is still working as it should. This helps you catch any issues early on, before you really need the tunnel for something important. A quick check can save you a lot of trouble later, which is good, more or less.
Troubleshooting Common Issues, You Know
Sometimes things might not work perfectly right away, and that's okay. Common issues can include problems with port forwarding on your router, incorrect configuration files, or network changes at home. When something goes wrong, the first step is usually to check your configuration files for any typos. Then, you can look at the logs of your secure tunnel software on the Raspberry Pi; these logs often give clues about what's happening. The Raspberry Pi community forums are a fantastic place to get help with these kinds of problems, as many people have already found solutions to common hiccups. You can learn more about Raspberry Pi projects on our site, and for deeper technical insights, you might want to visit this page . You could also check out resources like the official Raspberry Pi documentation for detailed guides. It's all part of the fun of learning and building, you know.
FAQs About Raspberry Pi Secure Tunnels
People often have questions when they first consider setting up a secure tunnel on their Raspberry Pi. Here are some common ones that might come up:
What is a secure tunnel on Raspberry Pi?
A secure tunnel on a Raspberry Pi is a private, encrypted connection that lets you send your internet traffic safely through your home network, even when you are away. It turns your tiny Raspberry Pi computer into a personal server that protects your online activities, making it seem like you are always browsing from home, which is quite useful.
Can a Raspberry Pi act as a VPN server?
Yes, absolutely! A Raspberry Pi can indeed act as a VPN (Virtual Private Network) server. Setting up a secure tunnel using software like WireGuard or OpenVPN essentially turns your Raspberry Pi into your very own VPN server. This allows you to connect to your home network securely from anywhere, giving you a private way to access your files and browse the internet, which is pretty cool.
Is it safe to use a Raspberry Pi for remote access?
Using a Raspberry Pi for remote access can be very safe, provided you set up a secure tunnel correctly. The
- Mark Singer Gorilla Glue Passed Away
- Jameliz Benitez Smith Leak
- Trevor Wallace Girlfriend
- Brigitte Macron Young
- Riley Greens Wife
How to Create Secure Reverse SSH Tunnel on Raspberry Pi? - ElectronicsHacks
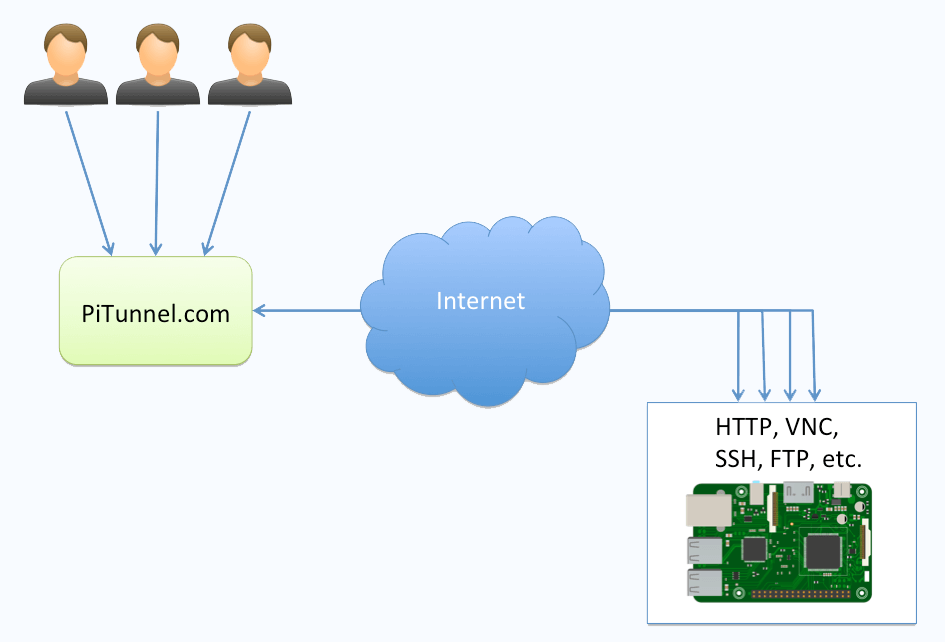
PiTunnel - Access your Raspberry Pi projects from anywhere
How to Create Secure Reverse SSH Tunnel on Raspberry Pi? - ElectronicsHacks
